Originally posted on February 25, 2010
WHAt CaN I FINd
(Tungsten*Hydrogen*Astatine - Calcium*Nitgroen - Iodine - Flourine*Iodine*Neodymium)
Have
your students use the symbols found on the periodic table to spell as
many words as they can. It's a fun and simple game, but it does help
familiarize your students with the periodic table, what's on it, and
where they can find certain elements.
Set the
parameters as you wish: work alone, as partners, or teams? how long do
words need to be to qualify? do plurals count? should they write out the
names of the elements as well?
In the past, I've
managed to work it so that the last day of school before vacation,
students take a quiz on the periodic table and the spend the remainder
of the period playing the game - it works out GREAT! You can offer a
prize to the student(s) with the most words or the longest word, but
it's not necessary - they're so engrossed in getting as many as they can
and besting their friends that they keep going on their own.
Friday, March 30, 2012
Wednesday, March 28, 2012
Photosynthesis: Photosynthesis Races
Originally posted on February 24, 2010

Carbon dioxide + Water + Light--> Oxygen + Sugar
6 CO2 + 6H2O + Light --> 6O2 + C6H12O6

Use index cards to create the equation components. You will need a set for each team you plan to have compete at one time.
Set one:
Carbon dioxide
Water
Light (Sun)
Oxygen
Sugar
-->
+ (x3)
Set two:
CO2
H2O
Light (Sun)
O2
C6H12O6
-->
+ (x3)
Depending upon the level of your students or how much of a challenge you wish to present, you can also provide the coefficients for students to put in the correct places.
I like to have each team begin with the words. The teams each work together to properly assemble their equation (remember, it doesn’t matter which order the reactants and products are in, just that they are on the proper side of the arrow).
As soon as a team claims to have completed the equation, I check it for accuracy. While I am checking, the other team can continue to assemble their equation in case the first team is incorrect. If they are incorrect, both teams continue to assemble the equation.

Once a team has correctly assembled the equation, the winning team moves on to chemical equations while the losing team continues to use the words.
This game can be played very quickly and is a good way for student to learn the equation for photosynthesis. By providing one additional card – ATP – and removing one card – Light – you can have students create the equation for cellular respiration. You could set up a whole tournament for your class to crown a photosynthesis champion!
Monday, March 26, 2012
Mining/Minerals: Mining in a Nutshell
Originally posted on February 23, 2010

In this activity, students form mining companies and are given a $1 million budget (use play money, the students love it and "buy" into the experience all the more). The activity leads them through the process of mining: map making, exploration, drilling, mining and the costs associated with each process. There is also an optional processing phase. The Women in Mining have done a fantastic job laying out all the steps for you, so they're easy to follow. In addition, there's a great student worksheet, which makes it easy for the students to track their expenses at each step. Really helps students grasp that mining isn't just digging randomly into the ground - a lot of preparation goes into the process to increase the chances of it being a profitable venture.
A few changes I have made...
Instead of using peanuts (due to allergies and durability), I used poker chips (which automatically eliminated the processing phase). Instead of putting dots of paint on the chips, I used colored star stickers. The color of the poker chips is irrelevent. In a perfect world (with unlimited budgets), I would have the chips be all the same color, instead I went with what was available. The colored stickers are spread evenly amongst the different color poker chips.
When writing this post, I noticed that they have created a lower grade version of this activity. Looks like the process has been simplified for elementary students.
Friday, March 23, 2012
States of Matter: Food Dye in Water
Originally posted on February 22, 2010

For this demonstration we’ll just be using a liquid, water, but at two different temperatures. We’ll use boiling water, whose kinetic energy is just shy of that of a gas and ice cold water, whose kinetic energy is closer to that of a solid.
Place two identical containers on the demonstration table, one filled with near-boiling water and the other with ice water (don’t put any ice in with the water). Hold a dropper of food dye in each hand and simultaneously place a drop of dye in each container. Observe.
The dye spreads out because the water molecules are moving around throughout the container and moving the dye with them. You will see the dye in the hot water spread out much more rapidly than in the cold water because the water molecules are moving so much faster.
Wednesday, March 21, 2012
Favorite Website: Women in Mining
Originally posted on February 19, 2010

In forthcoming posts, I will highlight some of the activities I have successfully used in my classroom. In the meantime, check it out for yourself!
Monday, March 19, 2012
Free Bill Nye Video Guides
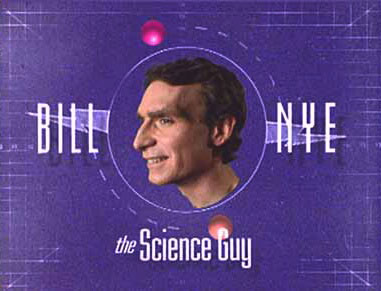
Each video guide has students document facts they knew before watching, new knowledge gleamed while watching, and complete 15 fill-in-the-blank questions.
My understanding is that they have created guides for the entire Bill Nye series. While I can't exactly confirm that, I do know that every episode that I'm familiar with is on the list.
What a great resource to utilize when including one of these videos in your lesson plans. Also great for making sub plans.
Friday, March 16, 2012
Potential & Kinetic Energy: Jumping Frogs
Originally posted on February 18, 2010

Have students fold origami jumping frogs using green index cards (the color really doesn’t matter, just makes it more fun). Allow students to play with the frogs and have them explain at which point the frog possesses 100% potential energy and at which point it possesses 100% kinetic energy.

Make sure you try your hand at making the frogs before presenting this lesson to your students. It's not hard to do, but you'll be much more effective at helping students if you've done it yourself first!
Wednesday, March 14, 2012
Classification: Pasta Dichotomous Key
Originally posted on February 17, 2010

Collect a large variety of different pasta shapes. Place one of each shape in a bag. Provide each student/pair/group with a bag of pasta shapes. Students then create a dichotomous key to identify each pasta shape. After completing the dichotomous key, groups can exchange keys to test them.

Collect a large variety of different pasta shapes. Place one of each shape in a bag. Provide each student/pair/group with a bag of pasta shapes. Students then create a dichotomous key to identify each pasta shape. After completing the dichotomous key, groups can exchange keys to test them.
Monday, March 12, 2012
Oceans: Earth Ball Catch
Originally posted on February 16, 2010

Beg, borrow, steal or buy an inflatable globe or other spherical representation of the Earth that can be tossed around the classroom.
Have students throw the globe to one another around the room. When a student catches the globe, he/she should look to see if his/her left thumb is on water or land. The student will call out "land" or "water" and the teacher (or another student) keeps a tally of land and water catches on the board.
At the end of the game, analyze the data and you should find that about 70% of the time, the student's thumb was on water. A great introduction to a study of oceans and water - emphasizing the large percentage of the Earth that is covered with water.
Friday, March 9, 2012
Density: Coke Cans
Originally posted on February 15, 2010

A classic…
Fill a small aquarium (or other clear container that can hold enough water) with water. Place a can of Coke and a can of Diet Coke in the water. The Diet Coke will float while the regular Coke sinks. Very little artificial sweetner is needed to sweeten the Diet Coke, as compared to the sugar used in regular Coke.
Some extensions…
Test your students understanding of density by using different sized cans of soda, if you can find them.

Measure out the amount of sugar and artificial sweetner used in each can to show students. Once you have it measured, store them in small plastic bags, so you have them for next time.
Wednesday, March 7, 2012
American Museum of Natural History: Seminars on Science
Originally posted on February 12, 2010

If you're looking for professional development credits, consider the American Museum of Natural History's Seminars on Science. There are currently 11 online courses offered, spanning the range of science disciplines. Graduate credit is available through a number of institutions.
The courses are co-run by an educator and a scientist from the museum. They run 6 weeks (with a 7th week to finish assignments) and you are provided with a CD of course materials (which are also available online).
I have personally completed the Space, Time, and Motion course and the Genetics, Genomics, Genethics course. I thoroughly enjoyed both courses and found the discussions, despite taking place through the computer, to the thought-provoking and engaging. I found the costs to be very reasonable and I couldn't recommend the program more.
**I am not being compenstated in any way for my endorsement of the American Museum of Natural History's Seminars in Science - I just really enjoyed my experience and want everyone to know about the program.
Monday, March 5, 2012
Action/Reaction: Hero's Engine
Originally posted on February 11, 2010

First, a little story...
Back when I first graduated and was looking for a teaching job, I needed to prepare a demo lesson on the 3rd Law of Motion. Being the dilligent (and hopeful) interviewee, I scoured the internet for ideas to bring to the lesson. One of the things I found was to make a Hero's Engine using a soda can. I had never heard of such a thing before, but gave it a shot. Turns out it worked pretty well. Fast forward a few months, when I had a teaching job at a well-supported school with a science lab filled with goodies and gadgets of all sorts... one of those nifty gadgets was a fancy, purchased-from-a-catalog Hero's Engine. Unfortunately, you needed to heat it (with a flame) for it to work and even then it really didn't work!
So, today, I provide you with some guidance for making your own Hero's engine - it's generally safe, it costs next-to-nothing, and it WORKS!
Get an empty, clean soda can out of the recycling. You'll be using a nail to punch holes around the bottom of the can. Before doing any hole-punching, you'll want to plan approximately where you'd like the holes to appear, as you'd like them as evenly spaced as possible.
To make the holes: use a hammer to pound the nail into the can. Once the nail is poking through the can, push it (the nail) to one side, so you create an angled hole (see picture below). Remove the nail and make additional holes. Make sure you angle all of the holes in the same direction.

Lift the tab on the top of the can, so it's sticking straight up. Tie a length of string to the tab.
To use: You'll want to work over a large sink/bin or outside and you'll want to work quickly. Fill the can with water and hold onto the string. The water will come out of the holes in one direction and push/spin the can in the opposite direction. Can be used as a demonstration or as one station in a series of activities related to the 3rd Law of Motion.
Friday, March 2, 2012
Microscopes: The e lab
Originally posted on February 10, 2010
e Cut out a lower-case letter e from a newspaper. Create a wet mount slide by placing the e on a slide, placing a drop of water on the e, and dropping on a cover slip. Place the slide on the microscope, so that the e is facing you, as you would read it. Draw what you see through the microscope. Move the slide to the right as you watch through the eyepiece, to the left, up and down.
This is a great introductory microscope lab for students. You can easily determine if students are accurately drawing what they see through the microscope or just drawing what they think they are supposed to see.
Subscribe to:
Posts (Atom)